Quick Start, Simple Usage Process

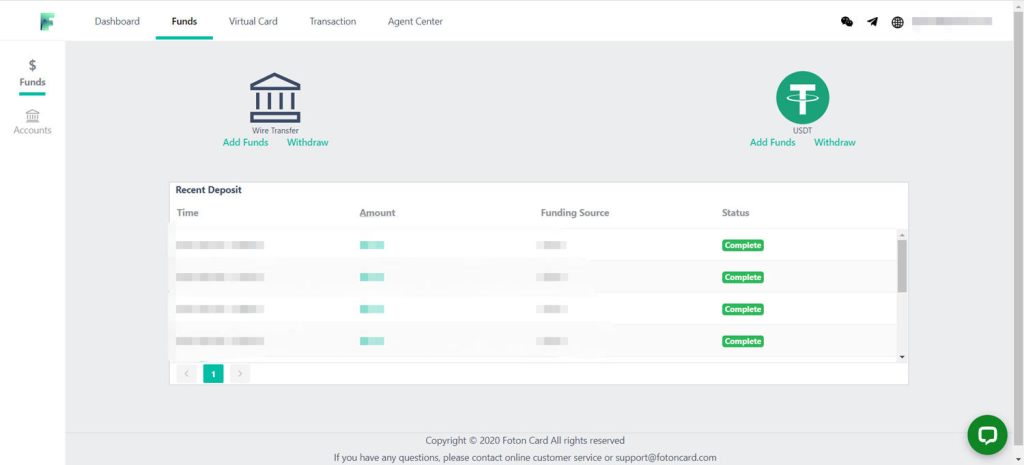
Account Deposit
There are 2 ways to deposit your account: Bank Transfer, USDT Transfer. USDT transfer will be confirmed in the real time, while bank transfer confirm time depends on banking system.
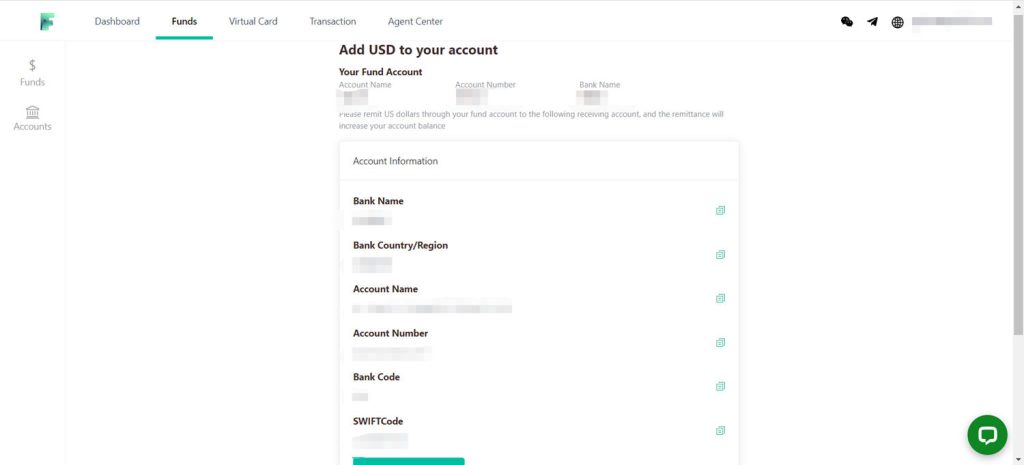
Recharge via corporate bank transfer
To add funds via bank transfer, navigate to [Funds] > [Wire Transfer] and carefully review the transfer information. Before submitting, ensure you have bound your fund account, which must be a company bank account type. Please remit funds in US dollars from your bound fund account to the provided receiving account; successful transfers will increase your account balance. FotonCard supports incoming funds through Wire transfers (SWIFT) as well as local bank transfers such as CHATS (RTGS), ACH, and FPS. Funds added via local transfers incur no fees and typically appear in your account within one business day, while Wire transfers may take 1-2 days longer.
Top up using the stablecoin USDT
To deposit funds using USDT, navigate to [Funds] > [USDT] > [Add Funds]. The platform exclusively accepts USDT on the TRC20 network. Each transfer is permanently recorded on the blockchain and cannot be altered. Once the transaction is successfully completed, the system will automatically detect and confirm the receipt on the blockchain (typically within about 1 minute), promptly credit the corresponding amount to your account balance, and send a confirmation email to your registered email address. Note that 1 USDT is equivalent to 1 USD.

Virtual Card
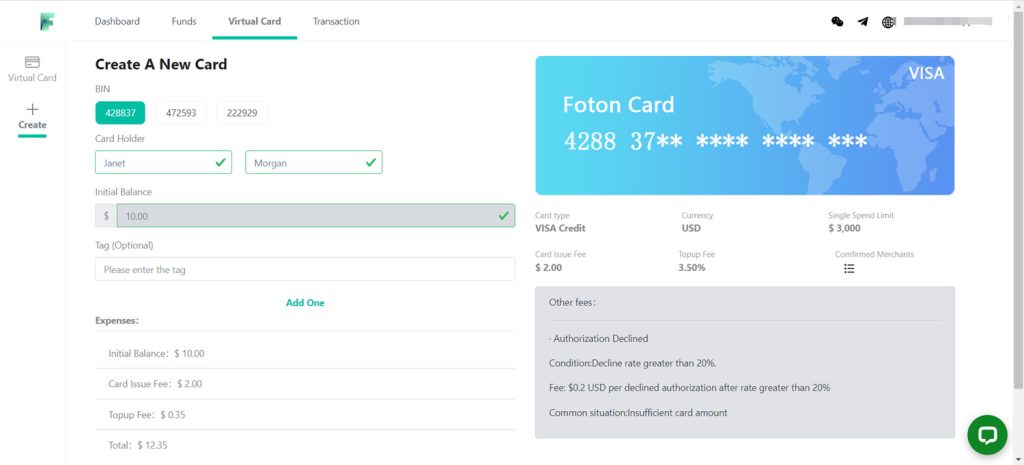
Start creating a virtual card
You can create one or more virtual cards with different card BINs by navigating to [Virtual Card] > [Create]. The top-up amount, top-up fee, and card fee will be automatically deducted from your account balance. Certain card BINs offer additional features, such as customizing the billing address, cardholder name, and other details. Once you submit the creation request, the cards will typically be generated and available shortly thereafter, with processing time varying based on the number of cards being created simultaneously.
View and manage your virtual cards
To manage your virtual cards, navigate to the [Virtual Card] section. The card security code (CVV) is automatically hidden for security and can be revealed by clicking to display it. Operations such as topping up the card, processing refunds, deleting the card, and viewing statistics are conveniently located on the right side of the table. The table includes the following fields: Tag, a customizable label for easier filtering; Balance, showing the current available amount (which may reflect slight delays due to processing); and Limit, calculated as the total top-up amount minus any refunded amount.

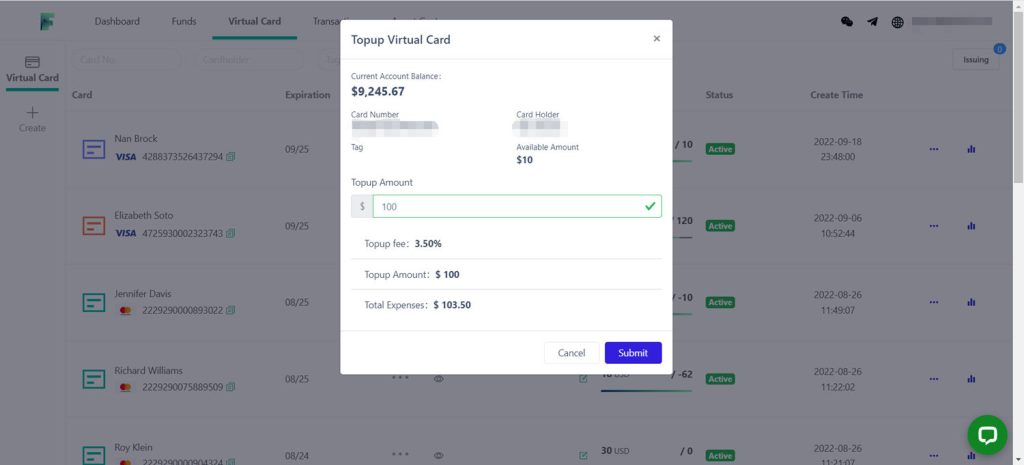
Top up your virtual card
To top up your virtual card, simply click the “Topup” option from the icon on the right side. The top-up amount and any applicable top-up fee will be deducted from your account balance, and the virtual card balance will be updated immediately once the top-up is successfully submitted.
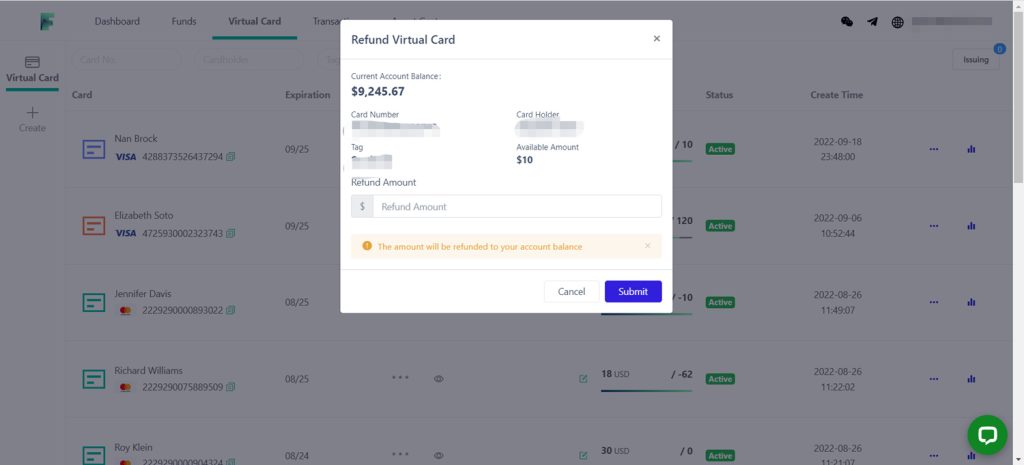
Request a refund through the platform
To process a refund, click the “Refund” option from the icon on the right side. The refund amount will be transferred to your account balance, and the virtual card balance will be updated once the refund is successfully submitted. Please note that the card’s available amount must remain greater than $10 after the refund; if you wish to refund the entire balance, you must delete the card first.
Delete Virtual Card
To delete a virtual card, click the ‘Delete’ option from the icon on the right side. Please note that once deleted, the virtual card cannot be retrieved. The card’s balance will be updated automatically upon successful submission of the deletion.

Transaction
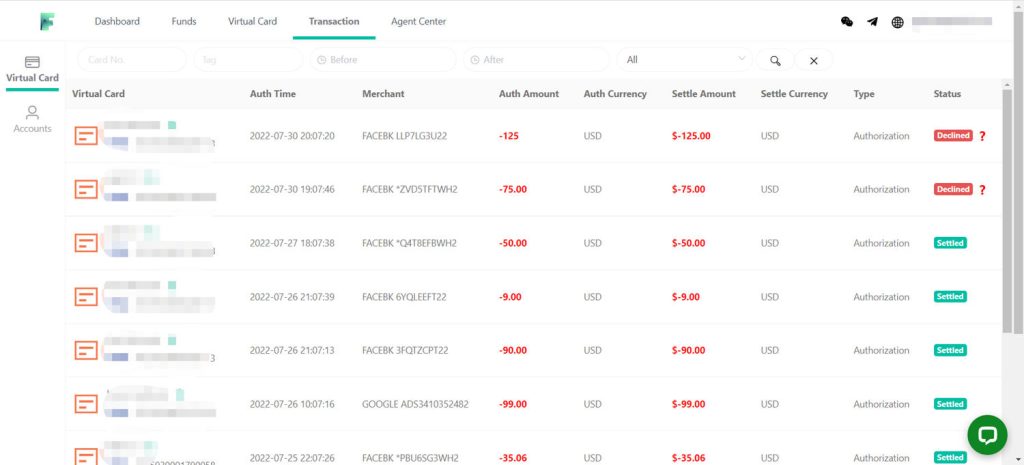
View the transaction details for the virtual card
Check your card transactions in the [Transaction] – [Virtual Card] section, where records can be easily filtered by card number, tag, date, or status. The available statuses include: Authorized (transaction successfully authorized), Settled (transaction fully completed), Pending (transaction currently being confirmed), and Declined (authorization failed).
Account
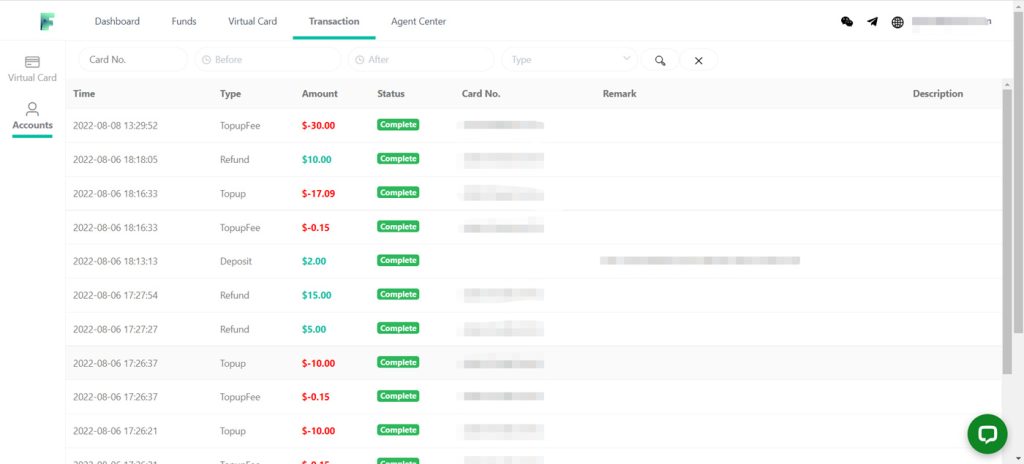
- Check account transactions at [Transactioin] – [Account]
- Records can be filtered by card number, date, and type
- Type Intorduction:
- Deposit:Account Deposit
- Withdraw:Account Withdraw
- Topup:Virtual Card topup
- TopupFee:Virtual Card topup fee
- IssueFee:Virtual Card creation fee
- TransactionFee:Virtual Card transaction fee, different card bin has different or no transaction fee for specific condition
- DeclineFee:Fee in case of authorization failed, different card bin has different or no decline fee for specific condition
Account Setting
Overview
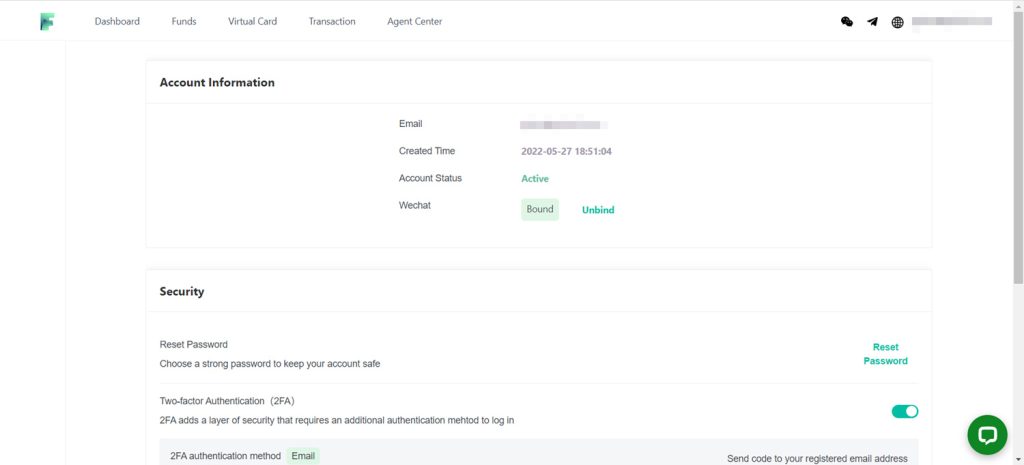
To access your account settings, click your email address in the top right corner. The “Account Settings” section includes Account Information, Security, and Fund Account Information.
Reset Password
Reset password at [Security] – [Reset Password]
Setting 2FA
At the [Security] section, users can manage their Two-Factor Authentication (2FA) status, which is displayed as Active or Inactive. 2FA is enabled by default for enhanced account protection and will be automatically required whenever a significant change in the login environment is detected, such as logging in from a new device or location.